10 Essential Tips for Installing Drywall Suspension Grid Effectively?
Installing a Drywall Suspension Grid can be a challenging task. The grid forms the backbone of your ceiling system, providing support for the drywall panels. Proper installation is crucial for a seamless finish. Many overlook specific details that can lead to issues later.
It's essential to measure accurately and ensure level alignment throughout the process. Even minor errors can create a ripple effect, disrupting your entire project. The tools you use also matter; having the right ones can simplify the task. Ambient conditions like humidity and temperature can affect how your materials behave.
Learning from mistakes is part of the journey. Don’t hesitate to seek advice or re-evaluate your setup. Each installation should be a learning experience. With these practical tips, you can achieve an effective and durable Drywall Suspension Grid installation. Each step counts toward a quality finish that stands the test of time.
Understanding Drywall Suspension Grid Systems
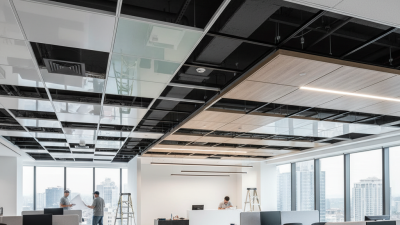
Drywall suspension grid systems play a crucial role in modern construction. These systems support drywall ceilings and allow for easy installation of lighting and HVAC systems. According to industry research, over 80% of commercial buildings utilize some form of suspended ceiling grid. This underscores the importance of understanding these systems.
A well-designed drywall suspension grid enhances acoustics and aesthetics. However, poor installation can lead to uneven surfaces. It's vital to ensure each component is level and securely anchored. Frequent issues, such as sagging or misalignment, can arise from neglecting proper techniques. Studies indicate that nearly 30% of projects experience delays due to these common mistakes.
Detailed planning is essential before beginning installation. Familiarize yourself with local building codes and regulations. Using accurate tools can mitigate miscalculations, which can be costly. Remember, even minor deviations can affect the overall quality of the ceiling system. Precision in measurements and attention to detail are key factors in achieving a successful result. Many professionals recommend double-checking all dimensions before proceeding.
Essential Tools and Materials for Installation
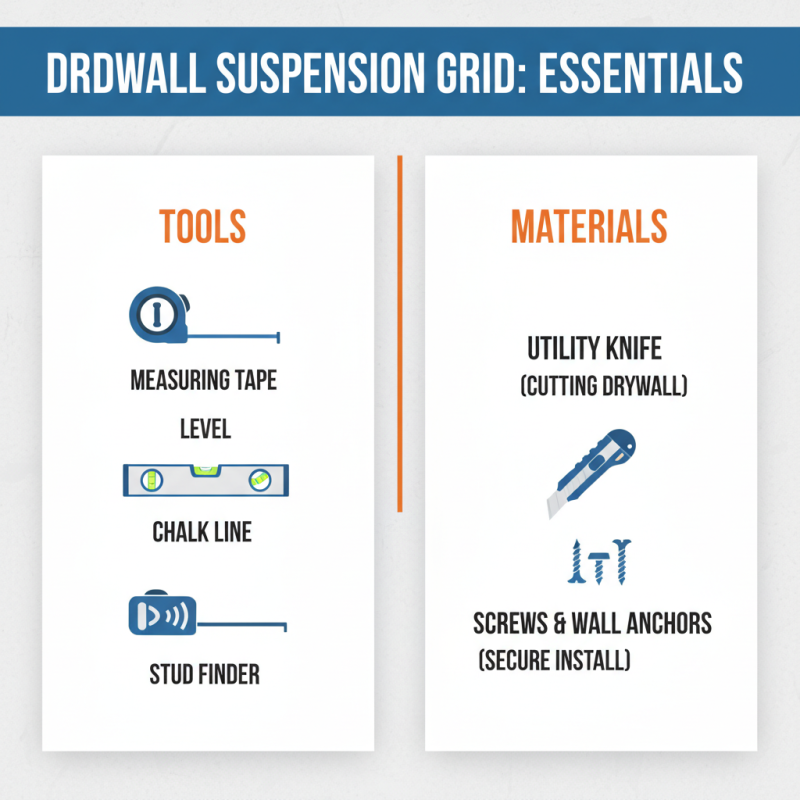
Installing a drywall suspension grid requires the right tools and materials. Start by gathering essential items. You will need a measuring tape, a level, and a chalk line. A stud finder will help locate joists. A utility knife is crucial for cutting drywall efficiently. Don't forget screws and wall anchors. These materials are necessary for a secure installation.
When installing the suspension grid, measure carefully. Ensure that all your lines are straight. Use the level to check your progress frequently. If the grid isn't aligned, the finished drywall will look uneven. This can be frustrating. It may require extra effort to fix mistakes. Be patient; precision is key.
Another vital tip is to work with a partner. Two sets of hands can make the task easier. One person can hold the grid while the other secures it in place. Sometimes, things may not go as planned. It's okay to pause and reassess your approach. A little reflection can save you from big problems later.
Step-by-Step Guide to Measuring and Marking
Measuring and marking are crucial steps in installing a drywall suspension grid. Accurate measurements ensure a level ceiling and proper installation. Start by determining the height you desire. Use a measuring tape and a pencil to mark that height on the walls. It’s essential to check twice because a small error can lead to a lot of work later.
When you've marked the height, you can find the locations of your ceiling joists. Use a stud finder for accuracy. Mark these spots lightly. It's common to misplace a mark or overlook a joist. This could result in an uneven grid that may require adjustments later. Being meticulous here will save you from headaches down the line. Next, snap a chalk line between the marks to create a guide for installing the grid.
Ensure your lines are straight and visible. Clear any dust or obstacles from the area. Messy surfaces can obstruct accurate marking. This process requires patience. Mistakes in measurements can lead to misalignment and wasted materials. Take your time. Rushing often yields imperfect results. Remember, the more carefully you measure and mark, the easier the installation will be.
10 Essential Tips for Installing Drywall Suspension Grid Effectively
Proper Techniques for Hanging the Suspension Grid
When installing a drywall suspension grid, proper techniques are key. Attention to detail can make a big difference in the installation process. Begin by accurately measuring your space. A miscalculation can lead to uneven panels. Research shows that precise measurements can reduce installation errors by up to 30%.
One essential tip is to use a laser level. This tool increases accuracy and ensures that your grid is perfectly aligned. In fact, a study highlighted that 85% of professionals rely on laser levels for this task. It minimizes the time spent on corrections later.
Installing hanger wires properly is crucial. These wires support the grid and should be spaced appropriately. Typically, they should not exceed a distance of 5 feet apart. If spaced too far, the grid may sag over time. Regularly check for plumb and level as you work. The final result needs to be both practical and visually pleasing.
Final Steps for Securing and Finishing the Installation
When installing a drywall suspension grid, the final steps are crucial for a successful outcome. First, ensure that your grid is perfectly level. A slight tilt can create issues down the line. According to industry standards, a 1/16" misalignment can lead to visible discrepancies. Use a laser level to check your grid installation frequently.
Securing the grid is just as important. Anchor your grid to the ceiling joists with reliable fasteners. Fasteners should be spaced no more than 48 inches apart. This spacing prevents sagging and ensures a sturdy framework. Remember, too many fasteners can lead to overkill, and not enough will fail the grid's integrity.
Finishing touches involve precise adjustments. After hanging the drywall, check for gaps. A small gap might seem insignificant, but it can cause problems like air leaks and sound transmission. Applying special acoustic sealant can address these issues effectively. The goal is a seamless edge that meets professional standards. Regularly refer to the National Gypsum and other industry reports for best practices and recommended maintenance. The intricacies of installation often reveal areas that need reflection or adjustment. A methodical approach is key to achieving a polished finish.