
A Gypsum Board Ceiling is more than a smooth surface above a room. It is a layered building system that can shape acoustics, lighting, fire resistance, and visual comfort. Standard panels are fixed to a metal framing system, then finished with joint compound, tape, primer, and paint. In a finished room, the seams should disappear. The details should not.
Michael Gardner, a gypsum-board systems specialist, explains, “Good ceiling performance begins above the visible surface.” That practical observation matters. Installers must consider framing alignment, fastener spacing, panel thickness, moisture exposure, and access for electrical or ventilation services. A poorly supported panel may sag. A rushed joint can crack under changing temperature or building movement.
The material is used in homes, offices, hotels, retail spaces, and institutional buildings. It can create flat ceilings, dropped sections, bulkheads, curved features, and concealed service zones. Some systems also improve sound control or provide tested fire-resistance ratings. Those benefits depend on the complete assembly, not the board alone.
A ceiling can look perfect on handover day. That does not guarantee long-term performance. Humidity, vibration, leaks, and unsuitable fixings may reveal weaknesses later. This is where specifications and skilled installation become essential. Even experienced teams must review the room’s conditions carefully. Small mistakes become visible quickly.
This guide explains what a Gypsum Board Ceiling is, how it is installed, where it performs best, and which limitations deserve attention. It also questions a common assumption: a clean ceiling is not always a well-designed ceiling. Performance remains the real measure.
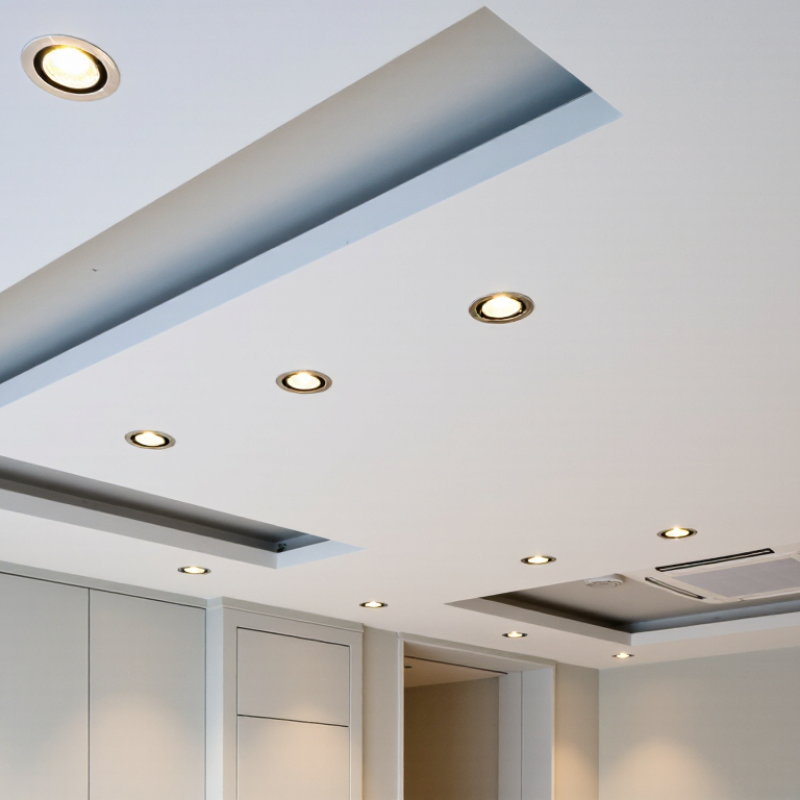
What Is a Gypsum Board Ceiling?
A gypsum board ceiling is a suspended or directly attached ceiling system made from gypsum panels. Each panel has a hardened gypsum core between paper facings. Installers fasten the boards to metal channels, timber joists, or a concealed suspension grid. The finished surface is jointed, sanded, and painted. It can look continuous, although every seam needs careful treatment.
The board creates a clean plane beneath structural slabs, roofs, or floors. It also hides electrical cables, air ducts, and plumbing lines. Service openings remain important, especially above kitchens and bathrooms. Standard panels suit dry rooms, while moisture-resistant and fire-resistant types require more suitable specifications. ASTM C1396 covers performance requirements for gypsum board, and EN 520 defines related board classifications in Europe.
Demand is substantial. The U.S. Geological Survey reported approximately 22 million metric tons of crude gypsum mined in the United States in 2023. Much of this mineral supports wallboard and plaster production. The U.S. Environmental Protection Agency’s Waste Reduction Model also recognizes gypsum board as a construction material with recycling potential, though local recovery systems vary widely. That detail matters. A ceiling is not automatically sustainable because it uses gypsum. Offcuts, joint compound, transport, and replacement work affect its footprint. In practice, accurate measurement reduces waste, but mistakes still happen around lights and access panels. Good installation depends on level framing, correct screw spacing, sealed joints, and enough drying time.
A gypsum board ceiling is a framed ceiling system finished with gypsum panels. It can hide wiring, pipes, and ventilation routes above the room. The main materials are gypsum board, metal or timber framing, fasteners, joint tape, and joint compound. Insulation may be added for sound control or thermal performance.
The panel core contains gypsum, while paper or fiberglass facing provides surface strength. Moisture-resistant panels suit bathrooms, but they are not waterproof. Fire-rated assemblies use tested board thicknesses, framing, screws, and joint treatments as one system. The U.S. Geological Survey’s Mineral Commodity Summaries 2024 identifies construction as the dominant gypsum market, supporting gypsum’s continuing role in building interiors. Industry shipment data also indicates that U.S. gypsum panel deliveries remain in the tens of billions of square feet each year.
Installation quality depends on small details. Installers should keep screw heads slightly below the surface without breaking the paper. Framing must remain level, or joint lines can reveal shadows under light. Acoustic ceilings may include mineral wool above the panels, but gaps around penetrations can reduce performance. Access panels are useful for maintenance. They also interrupt the clean appearance. That trade-off deserves planning. In damp buildings, poor ventilation can still damage the assembly, even when suitable panels are specified. Reality is less perfect. A ceiling drawing rarely captures every pipe, cable, or future repair.
| Material or Component | Typical Specification or Form | Primary Function | Common Ceiling Uses | Important Installation Considerations |
|---|---|---|---|---|
| Gypsum Board Panel | Factory-made panels with a gypsum core enclosed by paper or a suitable facing. Common thicknesses include approximately 9.5 mm, 12.5 mm, and 15.9 mm. | Creates the visible, continuous ceiling surface and provides a base for decoration. | Flat ceilings Bulkheads Coffered details Curved features | Select the board type and thickness according to span, moisture exposure, fire-resistance requirements, acoustic goals, and the applicable building code. |
| Metal Furring Channels or Ceiling Sections | Lightweight galvanized steel channels or sections installed in a regular grid, with spacing determined by the board system and structural requirements. | Supports the gypsum boards and distributes their weight to the suspension system. | Suspended ceilings, service voids, level changes, and concealed lighting layouts. | Profiles should be straight, corrosion-resistant, and fixed at the spacing specified by the system design. Openings for fixtures may require additional framing. |
| Perimeter Track or Edge Channel | Metal channel fixed around the room perimeter or along the edges of a ceiling layout. | Defines the ceiling boundary and helps provide support at wall junctions. | Room perimeters, ceiling drops, partition interfaces, and boxed-out areas. | The perimeter detail should allow for movement, accurate alignment, and compatible connections to adjacent walls or partitions. |
| Hangers, Rods, Wires, or Direct Fixings | Suspension components used to connect the ceiling framework to the structural soffit; the exact type depends on the ceiling design. | Transfers the weight of the framework and boards to the supporting structure. | Suspended ceilings, dropped ceilings, acoustic ceilings, and ceilings hiding building services. | Fixings must be suitable for the supporting substrate. Hanger spacing and load capacity should be calculated for boards, framing, insulation, access panels, and services. |
| Drywall Screws | Corrosion-resistant screws with heads designed to sit slightly below the board surface without breaking the facing. | Secure gypsum boards to the metal or timber framework. | Board installation on metal furring, steel framing, or timber joists. | Screw length, spacing, and edge distances should follow the board system requirements. Overdriving can damage the board facing and reduce holding strength. |
| Joint Tape | Paper or fiberglass tape designed for reinforcing joints between gypsum boards. | Helps reduce joint cracking and reinforces the connection between adjacent panels. | Standard board joints, internal corners, and selected repair areas. | Joints should be clean, properly supported, and treated with a compatible jointing compound. The tape type should match the finishing system. |
| Joint Compound | Premixed or powder-based material applied over board joints, screw heads, and accessories. | Fills joints and fastener depressions to create a smooth surface for decoration. | Painted ceilings, smooth finished ceilings, and repaired gypsum board surfaces. | Several thin coats usually provide a better finish than one thick coat. Drying time, temperature, and ventilation affect the finishing process. |
| Corner Bead and Edge Trim | Metal, paper-faced, or polymer accessories used on exposed external corners and edges. | Protects vulnerable corners and produces straight, durable edges. | Ceiling drops, boxed beams, bulkheads, access openings, and decorative features. | Trim should be fixed securely and fully embedded in joint compound before final sanding and painting. |
| Insulation Above the Ceiling | Mineral wool, glass wool, or another suitable insulation product installed above or between the ceiling members. | Improves sound absorption, thermal performance, or fire performance when designed as part of a tested assembly. | Rooms requiring acoustic separation, upper-floor ceilings, and conditioned spaces. | Insulation must not overload the framework. It should be installed without blocking required ventilation paths or interfering with recessed fixtures and services. |
| Access Panel | Removable framed panel sized to provide access to valves, wiring, dampers, or other services. | Allows maintenance without removing large sections of the ceiling. | Utility rooms, corridors, kitchens, bathrooms, and commercial service zones. | The opening requires additional framing. Panel size, load rating, moisture resistance, and fire or acoustic performance should match the surrounding ceiling. |
| Surface Primer and Decorative Finish | Primer followed by suitable ceiling paint or another compatible surface finish. | Seals the jointed surface, improves appearance, and provides the final color and texture. | Residential, commercial, institutional, and interior renovation projects. | The surface should be dry, dust-free, and evenly sanded. A primer helps reduce differences in porosity between boards, joint compound, and repaired areas. |
| Building Services and Fixture Supports | Electrical cables, light fittings, ventilation components, speakers, detectors, and independent support hardware as required. | Provides lighting, ventilation, detection, communication, and other functional services. | Office ceilings, kitchens, corridors, living areas, classrooms, and retail interiors. | Heavy fixtures and equipment should be independently supported where necessary rather than relying only on the gypsum board. Service penetrations must be properly finished. |
A gypsum board ceiling is a smooth, practical surface made from panels fixed to a metal or timber frame. It can hide wiring, improve room proportions, and create space for recessed lighting. Installation starts with a careful survey of the ceiling structure. Installers mark the finished ceiling height around the walls, then check the level with a laser or long spirit level. Small errors here become obvious later.
The supporting frame is fixed securely to the walls and ceiling structure. Hangers or channels may be needed when the existing surface is uneven. Boards are cut with clean edges and lifted into position, usually with staggered joints. Drywall screws should sit slightly below the surface without breaking the paper face. Openings for lights, vents, and access panels need accurate measurements. Poor planning can leave weak edges or visible gaps. It is worth checking each panel before continuing, even when the work seems repetitive.
Joints are covered with joint tape and compound, then sanded after drying. Several thin coats usually produce a better finish than one heavy coat. The surface should be inspected under strong side lighting before priming. Some imperfections only appear then.
Tips: Keep boards dry and supported during storage. Wear eye protection while cutting and sanding. Confirm fixture weights before attaching them to the boards. Follow local fire, moisture, and electrical requirements. A ceiling in a damp room may need suitable moisture-resistant materials, but ventilation still matters.
A gypsum board ceiling is a suspended ceiling system made from gypsum panels fixed to a metal framing grid. The reference dimensions below illustrate commonly used installation spacings; exact requirements depend on local building codes, board type, loading, and the framing system.
Installation overview: Installers first mark the ceiling level, secure the perimeter tracks, suspend the main channels, attach the furring channels, and then fasten the gypsum boards with drywall screws. Joints are taped and covered with joint compound before sanding, priming, and painting.
Gypsum board ceilings are commonly used in homes, offices, schools, hotels, and healthcare buildings. They create a clean, level surface beneath the structural floor or roof. In living rooms and bedrooms, they hide wiring, pipes, and uneven concrete while supporting recessed lights. Their smooth finish also suits modern and traditional interiors.
Commercial spaces often use gypsum board ceilings in corridors, meeting rooms, reception areas, and retail interiors. Contractors can form simple flat planes or stepped designs around lighting and ventilation. Sound-reducing assemblies are useful in offices and classrooms, where voices and equipment may create distractions. Fire-rated systems are selected for areas that require tested fire performance, but the complete ceiling assembly must match local building requirements.
Bathrooms and kitchens may also use specially designed moisture-resistant boards. They still need proper ventilation and careful sealing. Standard board can deteriorate when exposed to repeated dampness. That detail is easy to overlook. In renovation work, access panels should be placed near valves, junction boxes, and air-conditioning equipment. Otherwise, a small repair may require cutting open a finished ceiling. Site conditions matter too. A narrow stairway, heavy board sheets, or uneven framing can slow installation and affect the final surface. Professional measurement, suitable fasteners, and controlled joint treatment help prevent visible cracks. Even experienced installers may need to revise the layout after checking lighting positions.
A gypsum board ceiling uses panels made from a gypsum core and paper facing, fixed to a metal or timber frame. It creates a smooth, paint-ready surface and can conceal wiring, pipes, insulation, and uneven structural elements. In homes and commercial interiors, installers also use it to form stepped designs, recessed lighting areas, or simple flat ceilings.
Its main benefit is flexibility. The panels are relatively light, easy to cut, and faster to install than wet plaster. A properly designed ceiling can improve fire resistance, sound control, and thermal performance. These results depend on the complete system, including framing, insulation, joint treatment, and local building requirements. It is not automatically waterproof. Moisture can soften the core, stain the surface, or encourage mold growth. Impact can also leave dents, while poor joint finishing may produce visible cracks. A ceiling can look flawless at handover and still reveal movement months later. That limitation deserves attention.
Tips: Confirm moisture levels before installation. Leave access panels near valves and electrical equipment. Use suitable boards in humid rooms. Keep heavy lights supported by the framing, not only the panels. Ask a qualified installer to check fire ratings and ceiling loads. Small details matter.


